
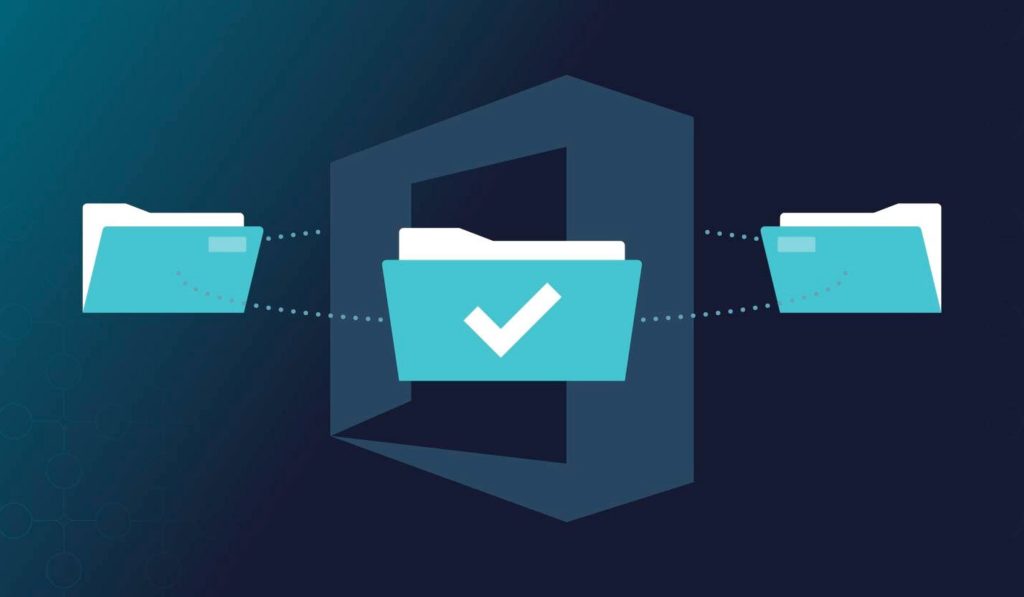
Learn the difference between OneDrive & SharePoint, how to share your files the right way, manage permissions, work offline and see how SharePoint works with Teams
Time Stamps
Agenda – 3:47
SharePoint & OneDrive – what’s the difference – 5:00
OneDrive overview – 6:06
How to view shared items within OneDrive – 9:20
SharePoint overview – 10:3
Viewing shared libraries in OneDrive – 12:05
How you can work in SharePoint from OneDrive – 13:10
How to create files and folders within OneDrive – 13:42
use “search” within SharePoint and OneDrive – 15:15
How do we “share” within SharePoint and OneDrive – 17:03
How to keep files private within OneDrive – 18:15
How to share your files from OneDrive when ready to collaborate – 18:43
How to build a link to share your files – 20:46
Understanding how we can limit who we collaborate with using the link function and what access we give them – 22:08
How does it look when users receive your link? – 25:55
How to manage permissions – 27:15
Understanding the difference between “sharing” and “direct access” within OneDrive and SharePoint – 31:43
How to view permissions and membership from SharePoint – 33:12
Understanding Membership across Microsoft 365 – 34:23
How to share outside your “group” from SharePoint – 36:15
How syncing works from OneDrive – 36:55
How syncing relates to “off-line” working – 39:19
Difference between document library (on computer) & browser version (cloud) – 40:15
Understanding “on demand” file access – 43:25
how Microsoft Teams works with SharePoint – 44:40
Start of Q & A session – 47:20
Matt: Morning, everyone. Welcome to the webinar. We’re just going to give everyone a minute to join and then we’ll get started. . Welcome, everybody, to the webinar. We appreciate your time. This is a one-hour session we’re calling Share and Sync with OneDrive and SharePoint. And before we get started, I just want to hand over to Totality, who’d like to give a short introduction.
Totality: Thank you, Matt, and thank you, everyone, for joining us on this bright and sunny day. So let’s get going with today’s webinar. The webinar today is the last in our Working from Home series. We’ve had some great feedback from our first three, and you all wanted to see how we could get the best out of SharePoint and OneDrive.
So, as you know, we have Matt Munslow back again to take us through this topic for the next hour. So enjoy. And just a note to say that we’re sending out links to all of the webinars produced, to all that have attended, for reference and sharing. So I’ll hand over to Matt now. The webinar will be recorded so it can be shared afterwards. Your microphones will be muted, but please feel free to ask questions via the Chat function. We’ll have a Q&A session at the end and we’ll pick out an answer at this time.
We hope you find this interesting and look forward to your feedback. So thank you and over to Matt.
Matt: My name is Matt and I’m the Head Coach at Collaboration Coach, and we’re a technology company that specialises in coaching and training Microsoft 365. I understand most of you, or many of you, will be using SharePoint already, but some of you are just getting started with it. And if you need any support deploying SharePoint, then Totality are there to help you.
So I’ll be hosting for the next hour and doing most of the talking, and I’m joined by Alex, who will be running the webinar and manning the Q&A. So say hello, Alex.
Alex: Hi, everybody.
Matt: And don’t worry, you won’t have to look at me for too long. We’ve got plenty of demonstrations and slides, but I just turn my video on at the beginning just to show you that I’m a real person. So you should see a Q&A window on the right-hand side of the Teams app. So whether you’re using the browser or the app, there should be a Q&A panel down the right-hand side and you can add in your questions there, either anonymously or add your name, and Alex is going to answer any that he can during the session, and then we’ll save plenty of time at the end to go through each of them one by one.
So, with that, let’s get on with the talk.
So I’ve got an agenda for you, and I’m not going to kill you with too many PowerPoint slides today. Most of it’s going to be demos, but I do have a few slides. So, the agenda’s going to be, first of all, we’re going to talk about SharePoint and OneDrive, and talk about what the differences are, and help you understand where you do work in OneDrive and why and where you do work in SharePoint.
Then we’re going to move on to how to share your files the right way. So, particularly if you’re coming from a File Share environment and you’re not used to the way sharing works in SharePoint, that’s going to really be useful to you to sort of describe the best ways to do the file sharing in SharePoint.
Next, we’re going to talk about how to manage permissions. So, once you’ve shared your files, how do you manage those permissions? How do you add and remove and refine the permissions? And I’m going to teach you how to do that. And then we’re going to look at how to synchronise the files and work offline as well. So look at the OneDrive sync client and what the use cases and benefits are of syncing and how it’s done. And then, finally, we’re going to look at how SharePoint works with Teams.
So, up till now a lot of the discussion, particularly with this webinar series, has been around Teams, so we want to kind of tie Teams and SharePoint together to show you how they work.
All right. So, I think the key takeaway for this session is these two lines. So OneDrive is for you, and SharePoint is for your Team. So that’s the thing I want you to take away today. Because it really helps when you think about where should you do certain things as opposed to others. If you think about OneDrive being for you, for your document management and for your creating and editing and modifying documents, and then SharePoint is for your Team. That’s where you do all your Team related collaboration, creating, editing documents.
So, as I go through the talk today, I’m going to reiterate these points over and over again so, hopefully, by the end of this session it’ll be clear to you what you can do in OneDrive and what you should do in SharePoint.
So let me switch now to my browser. Most of this session is going to be in the browser and it’s going to be demonstrations, and what I’ve got here is a – my demonstration tenant. So this is all fake data and fake people but I use it to illustrate the points I’m making. So I’ve got a OneDrive and some SharePoint sites I’m going to show you and as we go through I’m going to do my demonstrations from each of these.
So, first of all, I wanted to talk a little bit about the features, functionality and the look and feel of OneDrive and SharePoint so we can see what the differences and the similarities are. So I’m going to start off in OneDrive, and you can see I’m in the browser here and I’ve got my OneDrive app open. Now, the way I get there is by going to the app launcher in Microsoft 365 and going to the OneDrive tile. And this is the OneDrive landing page.
Now, any of you guys coming from like a file share environment, perhaps you’re moving to SharePoint or you’re in between moving, OneDrive is very similar to the traditional home drive. So if you’re an older gentleman like myself, you’ll remember having G-Drives, H-Drives, things like that; personal areas where you could store your own stuff and nobody else had access to it. That’s the idea behind the OneDrive. And the big difference is, it’s in the cloud. That’s the biggest difference.
So, one, it’s in the cloud. You get lots of benefits like easy access. So you no longer need a VPN to get into your file share because OneDrive is available everywhere, and it’s also available from every device as well. So, as well as being able to access OneDrive in the browser, there’s an app for your tablet, there’s an app for your phone, and it’s pretty much available from anywhere you can access it.
So that’s one of the big benefits as well.
Now, SharePoint is very similar in that respect. Again, there’s an app for the phone and the tablet, and it’s available through every browser. And it’s all stored in the cloud. So, in that sense, OneDrive and SharePoint are very, very similar.
So next, let’s have a think or a look at the look and feel of OneDrive and SharePoint. So you’re probably very familiar, if you’re using SharePoint already, with this library and folder setup. So just like on a file share, SharePoint has libraries of folders and files. So on this default or landing page for OneDrive, you’ll see I’ve got my files listed here and I’ve got a bunch of folders. If I scroll down you start to see I’ve got some files, got spreadsheets, Word docs, PowerPoint slides, and so on. Then I’ve got these folders I can click into, and within those folders we can have other folders. So you can nest folders just like you can with a normal file system. And then I’ve got files within my folders as well.
And you can see the breadcrumb building at the top here. And at any point I can skip back to the different levels of the breadcrumb. So, in that sense, it’s very similar to a file system.
You also see we’ve got different views along here. So I’m looking at my files, which is essentially all of my files in my OneDrive, but I can also switch to a recent view, which will show me the files that I’ve most recently been working on. For example, this one, I last accessed it 11 minutes ago.
You can also have a look at the files that have been shared with you. Now, a big part of this talk is around sharing. And you can see at a glance which ones have been shared with me and which ones have been shared by me as well. So a good way, for example, if someone tells you, “Oh, I shared that file with you last week”, and you can’t remember which one it was or where it was, Shared with me is a good place to come to find it.
Discover is using artificial intelligence to kind of surface stuff that might be relevant to you, and then, finally we’ve got the recycle bin as well. So just like in Windows, you can delete a file and then you can restore it here as well. So you’ve got complete control.
Now, that’s a key part of the idea behind the OneDrive is that you have control, you manage your OneDrive, and nobody else really needs to get involved. So you’re not restricted any more by having to raise service tickets to IT and that kind of thing. It’s all up to you. You can do whatever you like with it.
All right. So now I want to compare that to SharePoint. So what I’ve got here is a SharePoint site and it’s called the Mark 8 Project Team. And I’m going to keep coming back to this site over and over. This is going to be like the demonstration site that I use to sort of compare and contrast OneDrive and SharePoint.
So you can see here, the SharePoint site is more like a traditional intranet site but, as well as that, it stores documents. So those of you familiar with SharePoint will probably know that it’s really good at other things, like intranet, but for this discussion we’re just going to focus on the documents side of things.
So you can see I’ve got documents library here, and when I drill into that, it’s going to look and feel very similar to what we saw in OneDrive. So we’ve got folders, and we’ve got files. And if I just compare them – just drag that over there, put that guy over there – you can see they’re very similar the way they work, the way you click around. You can see it’s very obvious which app you’re working in. So OneDrive on this side, SharePoint on this side. But essentially, they look and feel very similar
And that’s one of the cool things about this is that you don’t have to learn any new skills to switch between OneDrive and SharePoint. It’s all exactly the same. The way you do sharing, the way you do syncing, it’s all completely the same. So if you know it in OneDrive you know it is SharePoint.
All right. Now, one thing I wanted to call out is this shared library section down here on the left. So I’m back in the OneDrive and I’m looking down here on the left-hand side at the shared library section. Now, you notice that I’ve got a Mark 8 Project Team shared library here. If I click on it, that’s actually now looking at that Mark 8 Project Team SharePoint library, the one we were just looking at just then, which is this guy here. So now I’m in SharePoint and I’m looking at the documents library in the Mark 8 Project Team.
Now, switching back to OneDrive, I can drill in now to the Mark 8 Project Team documents without leaving OneDrive. Now, what Microsoft’s trying to do here is make OneDrive the sort of starting place for all the work that you would possibly do with documents within Microsoft 365. So it’s trying to make it a bit more convenient for you to get work done without having to go out to other websites and other places, other areas, by opening new tabs in your browser. So I can actually work on Mark 8 Project Team documents from within OneDrive if I want to.
So that’s another key thing that Microsoft’s doing gradually is bringing in everything into OneDrive, so OneDrive is the first place you come to. And you only have to open up the SharePoint site when there’s something specific you need to do.
So let’s show you just how we can create folders and files within OneDrive. So I’m just going to come up to my files again, so I’m in the files landing page. Now, as well as the files and folders we’ve got here, we can also create new ones. So I can create a new folder. I’m just going to call that slides. And now, here’s my new folder. And I can click in and I can add new files, like a PowerPoint presentation, that will open up the new slides in my browser, and then I should see a new file – I’ll have to just refresh that – and there’s my presentation.
So managing files and folders is very straightforward and easy. You’ll also notice that you can, if I go back to the files, you can drag folders as well. So if I drag a folder up to this demo folder, that will move – actually, it’s locked, sorry – that will move the folder up into the demo folder. So I’m moving the slides into the demo. There we go. Now, if I click into demo, there it is.
So you can see, just like a file system in File Explorer, you can drag/drop folders and files and it’s very flexible and easy to use.
OK, so the last thing I wanted to show you, just to talk about the differences between SharePoint and OneDrive, is search. So search now cuts across OneDrive and SharePoint. In fact, all of Microsoft 365. So when I do a search now, I can search just in OneDrive or I can search across all the files in Microsoft 365. A key thing here is to know that, obviously, when you search, you only see the files in search results that you have access to. So you’re not seeing anything private that hasn’t been shared with you already. You only see what you’ve been given permission to see.
So let’s give this a try. So if I come up to this search bar – now, this search bar is ubiquitous now in Microsoft 365, you should see it wherever you go – and if I switch to the Mark 8 Project Team just quickly, you can see it’s up here too in SharePoint. So I’ve switched back to OneDrive. So if I choose, say, the key term ‘marketing’ and I hit the return button, it’s going to show me all the files with the key word, marketing, or key word in the content for marketing. But you can see, also, as well as files from my OneDrive, I’m also seeing files returned from all of SharePoint as well.
So I can see the location here. The location is showing me files from different areas of SharePoint, all in one search results. So it’s consolidating search results from everywhere. So that’s really useful if you’re searching and you’re not sure whether it’s OneDrive or whereabouts it was, you just want to use search to cut through all that, the hierarchy or the different sites that you’re a member of.
Right. So let’s move on to the next part of the talk, which is about sharing. So, I’m going to go back to my files section here. I’m just going to move that. So in files, you’ll notice that in this list, which is all my files and folders, I have this sharing column. And as I scroll down you can see that some of those files are private and some of those files are shared. So this comes back to our mantra of OneDrive being for you and SharePoint being for your Team. So every file that gets created in One Drive is private, by default. So you have to explicitly share it for other people to have access to it.
So, if you notice, you remember my slides folder I created, and then the PowerPoint deck within that that I just created in the demo, all private. You can see that at a glance. All private. So that’s important. Because when we go to look at SharePoint in a minute, you’ll notice that everything is shared, obviously, because the Team has access to it. So everything you upload into SharePoint is accessible by the Team.
So, one of the good use cases of OneDrive is where you don’t want people to see what you’re doing. Because there could be something that you’re just working on. You’re developing something that’s not really ready for prime time; you don’t want anyone to be able to see it while you’re developing it. That’s a really good example of when to use OneDrive.
Now, not to say, though, that you can’t share from your OneDrive, because there could be a point where you get to in the work you’re doing where you need some outside help. Perhaps you need someone to come and review what you’re doing, maybe proofread a document, something like that. You don’t want to share it with the rest of the team yet but you do just need someone to come and collaborate on it with you. That’s a great example of when you might want to share a document that’s in your OneDrive with somebody else.
So I’m going to give you an example of that now. I’ve got a couple of presentations here. Now, I’m going to create a new slide deck here, and I’m just going to call it Agenda. Now I’m going to go back to my deck, just refresh that. So now I’ve got a folder full of presentations. Two of them are shared. These two here, workshop agenda and workshop agenda dark. And then this new one that I’ve just created is private.
So now we’re going to go through the options we have when we share a document and I’m going to show you how that works and how you’d use it. Because, coming from a file share background, if that’s you, then you might not be familiar with this new process of sharing. It’s common now across other document management apps like Google Drive and Dropbox, but it’s not something that you’d be familiar with if you’re coming from a file share background.
So let’s go through it. So you’ll notice that there are share buttons everywhere. When I select a file, you’ll notice that there’s a share button in the ribbon here. There’s a share button here – that little sort of arrow icon, that’s a share button. If I go to the ellipsis, there’s a share option here as well. So there’re share buttons everywhere. It’s really upfront and centre.
So if I want to share a file, I just select it and choose the share button and this card appears. Now, what we’re doing here is we’re actually building a link that we’re going to share with somebody else. So the link is what you share with the individual and it’s that that gives them the permissions to the file.
So we can build different kinds of links, and this is how we do it. So let me describe what we’re seeing on this, because it’s quite a busy card here. So we’ve got the send link at the top. We’ve got this thing here. Anyone with a link can edit. Then we’ve got an area where we can type in a name or an email address, and a place where we can add a message, and then we’ve got a send button. So it’s like we’re building an email, almost, to send. And then, at the bottom here, we’ve got the copy link and the outlook button. So let’s go through and describe what all of this means in a bit more detail.
So, first of all, we’ve got this Anyone with a link can edit. Now, what that means is that anyone literally can edit this document if we send them the link. So that could be anyone inside your organisation or outside your organisation, and they don’t have to log in either. So they’ve basically got anonymous access to your file. So we might not want to do that. That might be too much. Perhaps what we’re working on is sensitive and we only want specific people to be able to see it or even edit it. So what we can do is we can press this guy and it changes to this Link settings card. And now we’re looking at different options we have to choose which people can view our file.
So let’s have a look at the Anyone is a bit more detail. So remember, anyone is basically anonymous access. So that might be useful. I often use this with my customers because I can send them the link and I can put some restrictions on that link down here. So each of these guys has different settings that you can add. You notice the little bottom part changes. So anyone with a link can allow editing or not. So you can toggle that on and off. So you could switch off editing. Perhaps I don’t want to allow people to edit, I just want them to review it. You can set an expiration date, so you can make sure that once a certain date, perhaps a week in the future, has been hit, that link will no longer work. It will be expired.
The next one is the password. So you can set a password here. And then you would have to share the password along with the link. So the person could put it in. When they click on the link it’ll prompt them for the password, they can enter the password and they get access. Otherwise the link won’t work.
And then, finally, we can also block the download. So, say we don’t want to allow the people to view and download the file so they can, you know, send it on to other people or make changes to it themselves offline, we can block a download too. So it’s kind of just making sure that we’ve got control over what that person can do with our file.
OK, so what’s happening here is this top one, Anyone with a link, is the most open of all the choices we have. So it’s the most open because anyone has access. The next one down is this People in Collaboration Coach. Now, people in Collaboration Coach is basically all the people in your organisation. Collaboration Coach is my organisation, so just replace that with your own. So that means basically anyone in the org who’s logged in to your Microsoft 365 tenancy can have access to that file. And you’ll notice as well we can set editing and we can block the download as well. So you’ve got a little bit of control. But notice the password and the expiration date is missing.
The next one down is the People with existing access. So this isn’t actually giving anybody new rights or permissions on your file. All it’s doing is preparing a link that you can share with them so they can access it. So it’s not changing permissions at all, it’s just sending people a link.
The last one is Specific people. So specific people requires you to actually name the people that are going to be allowed to open up this file. And again, you can choose from allow editing and block download as well. So let’s do that. Let’s choose specific people and then we’ll allow editing and then we’ll apply. Now, you can see this has changed to People you specify can edit. So now what I need to do is type in the names of the people I want to share with. So I’ve typed in a couple of names. You can add as many as you like. You can do a little message at the bottom here. And then, when you hit the Send button, that sends an email to both of those people, Megan and Pradeep, and it will have a link to the file in their email.
So I’ve got Megan’s email opened up here. I’m just going to switch to – this is Megan now I’m looking at, Megan’s account – and I can show you what the email looks like. So the email comes from me, Matt, and Matt Munslow shared a file with you. There’s my message. And this is a link to the file. So if I click on that, it’ll actually open up. And then down here you can see this link only works for the direct recipients of this message. So only Pradeep and Megan can open up the document. If Megan was to send this email to somebody else, they wouldn’t be able to open up the file.
OK. So moving along then, the next part of the talk is going to be about permissions. So, so far, we’ve shared our documents, so we took our agenda PowerPoint presentation, and you’ll notice now that in the sharing column it’s switched from private to shared. So now I’ve shared that document. So it could be that later on you want to manage those permissions. Perhaps I want to change who I shared it with or I want to add people to it. So, all I need to do to manage that stuff is to hit this little shared link here, and this applies to any document. I can do this on any one. So if I hit shared there, this manage access panel opens up on the right hand side, and now I’m managing the access of the Agenda slide deck.
Now, you can see here that there’s, front and centre, right at the top here is the Stop sharing button. So a lot of the time – I’ve done this many times, I’ve shared it with the wrong people and I’m panicking and I just want to remove all sharing and just start again. So the Stop sharing button will actually remove all sharing. So if you’ve shared something sensitive that you suddenly want to revoke that permission, hit the Stop sharing button and you’re good again. So that’s up there and nice and obvious.
But let’s have a look down here and see what we’ve got. So we’ve got this section called links giving access. And you can see below here I’ve got a link here that I can copy, and then below it says people you specify can edit. So this, this is the link that we’ve just created using the sharing button. So we’ve built this link. We specified that the people can edit. And then, if I just expand that, you can see here are the people that we specified. There’s Megan and Pradeep.
So now, if I wanted to, I could change this. I could change what that link does. So if for example, Pradeep no longer needs access, I can just hit the X and remove him, and now Pradeep can no longer use that link. When he clicks on it, it’s going to not open for him, and just tell him the link’s expired.
I can also go into the options for this link. So if I come to the ellipsis on the right here, I can go in. Now I’m managing the link, what the link can do. So I can change, for example, this from edit to view. Now Megan can only view. And I can add new people in as well if I want. So I’ll add Alex in. And now I’ve got Megan and Alex. They can only view. They can’t edit.
So if I save that, it’ll ask me if you’re sure you want to change, you just hit OK, and now we’re done.
So, if I wanted to, I could also remove the link entirely. So if I suddenly realised that, or I decided that these guys don’t need access any more, I can remove the link from here too.
Let’s just go back into sharing. And let’s imagine that we want to create another link. Perhaps we want to change the existing link to edit. So let’s give the guys edit again. And this time we want to go back in and we want to create an anonymous link that everyone can view the file. So I’m going to hit share again, and you see we’ve got that same link building card popup. And this time I’m going to choose Anyone can edit the link, but I’m going to restrict it by removing editing, I’m going to set an expiration date and I’m going to block the download and then apply that.
So now that’s built in, you can see the little icons there showing you it expires, and the download is blocked. Then I’m just going to copy that link. I’m going to copy it. Now I can throw that into a Teams chat or a Skype chat or any kind of chat, put it in an email, or wherever I like. And you can also see – if it refreshes, try that again – now you can see I’ve got my original link, which allows Megan and Alex to edit. But I’ve also got this other link that allows anyone to view it. But only up to a certain date, and they can’t download.
Now, direct access. Moving on. So direct access is fairly straightforward in OneDrive because, really, only you need direct access in your OneDrive, because you manage the whole site and only you need those types of privileges. I would recommend using sharing links over direct access in your OneDrive. It just makes more sense. It’s much easier to manage, and particularly if you’re doing bulk sharing, it’s easy to do. But direct access is essentially exactly the same but, rather than creating a link, you’re actually giving them permissions on the file.
So if I wanted to give Pradeep permission on this file, for example, I can give him either edit or view, and then I can hit grant access, and then Pradeep will be added to the bottom there. Obviously not refreshing that well today, so let’s just give it a push. There we go, there’s Pradeep now. And I can change his access as well.
So he won’t have a link, which is nice and convenient, to that file, but he will be able to access it if he bookmarks it or goes to the shared with me section.
OK. So now let’s switch over to SharePoint and have a look at what membership and permissions looks like there. So I’m going to switch now to my Mark 8 Project Team site. Now, documents, as we’ve said, are shared in exactly the same way. So I can select a file and I can hit the share button and I can share in exactly the same way as I can with OneDrive. So it all works in the same way. But the big difference is, is the membership. So because I’m a member of the SharePoint site, I automatically have access to all the documents and folders within it. So you can check who’s a member of your site by going to the far right-hand side over here and choosing the members link.
Now, this is showing me all the people – if I scroll down you can see all the members there, the 20 members of this site – and I can also see what privileges they have. So, for example, Alex is a member. And I could change him to an owner or I could just remove him from the group altogether.
So it’s membership of a group that gives you access to the SharePoint site. And I just want to – I’ve got a slide here I wanted to show you guys just to illustrate that fact. Because this is quite important and it plays into some of the other apps and services that we’re going to talk about later. So membership of this group gives you access to the SharePoint site. So the group and the site are intrinsically linked. You must have access to the group to be able to access the site.
So that also applies to other apps like Teams. So you must have access to the group to get access to Teams. And what Microsoft is doing is making group management much simpler than it used to be by just having one group that gives you access automatically to all the other apps and services that a group of people would need to collaborate.
So, for example, other things like a notebook and a calendar, people who collaborate together need that kind of stuff. Other apps and services like Microsoft’s Planner and Yammer are also linked to the group. So membership of the group, rather than have one group for each of these circles, you’ve got like a hub and spoke system where membership of the group just automatically gives you access to all these other things. So when we talk about the Teams at the end of the talk, you’ll see how that plays into the Teams world as well.
So, switching back to my SharePoint site. All of these people are members of that big blue circle in the middle there. This guy here. So that means sharing within SharePoint is much easier. If you have everybody as a member of the group, then they just have access automatically. But if there are any other … if there is any need or reason to share outside that group, then you’ve always got the sharing system that we looked at earlier to fall back on. So you don’t have to make other people members of the group just to share one file or folder with them, you can use this Send Link option instead.
OK, so we should move on to syncing. So what I’m going to do for syncing is just start again with OneDrive and I’m just going to show you what syncing does and why it’s important. So again, I’ve got a slide here, which kind of illustrates what’s going on with syncing. So essentially, syncing makes a copy of what’s in the cloud on your computer. So this guy represents the cloud, this one up here, and this one represents your computer. So essentially, if a file gets created in the cloud, a copy of it is moved onto your computer. And vice versa. If it gets created here, it gets moved up into the cloud.
And any changes that are made in either area are automatically synced to each other. And there’s a nice reciprocal relationship going on there.
Now, syncing isn’t enabled for everyone by default. You choose to sync if you want to. You don’t have to. So syncing is initiated by you, and I’ll show you how.
So you’ll notice in SharePoint and OneDrive you have this Sync button that’s everywhere. Everywhere you go you see this. Now, syncing initiates the OneDrive sync client, which manages this relationship. So you initiate the sync, the sync begins, and then it just runs in the background and you can forget all about it. That sort of process of syncing just happens without you having to think about it.
So let’s see what that looks like. So if I switch back to my OneDrive, I hit the Sync button, that then starts the sync client and the sync begins. Now, how does that look on the actual computer? So, if I go to my File Explorer, you’ll see now I’ve got this OneDrive Collaboration Coach link in my File Explorer. And this, if you’re a Mac user, this is exactly the same but in Finder. So you’ll see now I’ve got all my folders and files, and these are actually on, this is like a copy of them on my computer. So this is one of the key use cases for using the sync client.
So if you’re on the road a lot – obviously we’re not at the moment, but you may be again one day – on the road, travelling about on planes, on trains, in places where there is no internet connectivity, OneDrive sync client allows you to take everything in your OneDrive offline and work on it, and then, when you come back online it will then sync the changes back up to the cloud.
So that’s one of the big use cases. The other one is, if you’re an old geyser like me, you might be more comfortable using the File Explorer or, in my case, I use a Mac most of the time, I like to use Finder. And you’re just more comfortable using those tools instead of opening up a browser and going into the cloud.
So those two things are kind of the key reasons that you’d use the sync client.
Now let’s just see how it works. If I just pull that File Explorer to the left there and then open up OneDrive on the right-hand side, so let’s go into – we’ll go into the demo folder. And I’ll go into the demo folder here. So you can see they match exactly. If I go into slides, I go into slides, so if I make a change here and just rename that, to Matt’s deck, what will happen over here on the right-hand side eventually the sync will just happen. And sometimes you might have to – just for demo purposes I’m going to refresh it – you can see it’s refreshed and added that change to my file.
And vice versa. So if I was to say delete this, so I’m deleting it from the cloud, that will then delete it from my computer. There it’s gone.
So you can see that relationship just working in the background nicely. I don’t have to worry about any of it.
Now, what’s actually happening is we’ve got this little OneDrive client running in the sys tray, and if I put that up, you can see here’s the history of all the changes that have been made between OneDrive and the computer. You can see the file was removed, the file was renamed and so on. So that OneDrive sync client just works away in the background. You don’t have to worry about it at all.
So that works exactly the same way with the SharePoint site. If I just bring up my Mark 8 Project Team. So here I am in the Mark 8 Project Team. I’ve got my sync button – actually, if I just go to documents – I’ve got my sync button here and that works in exactly the same way. So if I hit sync, it opens up the client, the sync begins. It says, it confirms that now we’re syncing. Now look what happens if I go back to File Explorer. So you remember I just showed you this guy here? OneDrive Collaboration Coach. Now I’ve got a second item here, Collaboration Coach. And here I’ve got all the files that I’ve synced, files and folders that I’ve synced. So this one’s from my Mark 8 Project Team and I’ve got other ones I’ve synced too.
So again, if I just pull that to the right, you can see here are my SharePoint files synced to my computer. And there’s all the SharePoint files up in the cloud.
So OneDrive and SharePoint work in exactly the same way and they’re all accessible from your File Explorer.
One of the other things that I think a lot of my customers like is the fact that in SharePoint when you click on a file it opens the browser version of the app. So if I click on a PowerPoint slide … sorry, say an Excel spreadsheet, it will open up Excel in the browser. Whereas if I do it from the File Explorer, it’ll open up Excel the app. It just takes a little while to do it. So that’s another interesting or helpful thing to have.
So, one thing to point out as well is that all these files are something called on-demand. So the files live in the cloud by default but they’re not moved to your computer until you’ve actually opened them. So you can see the status here is cloud, for most of these, but because I opened this Campaign Sales Data, it’s showing the file as available on my computer. So this is really useful. Say if you had a big treasure trove of images online, or video, and perhaps what you have online is bigger than what you could actually fit on your computer, you don’t have to sync everything in one go. You can keep some of it in the cloud and keep some of it on your computer. It’s entirely up to you. But this also is good for things like bandwidth. So for example if you were to turn OneDrive sync on for your whole organisation, you may cause network and bandwidth issues. This way, there is no bandwidth issues because it’s not copying things down to your computer until the user expressly chooses to do so.
All right. So just noticing the time, I should move on to the final part of the talk, which is around Teams. So, what I’m doing here is looking at the Teams app, and I’m going to show you now how Teams and SharePoint and OneDrive all relate to each other.
So, as you can see here, I’m in the Mark 8 Project Team Team. Now, remember my slide where I showed you that if we’re a member of the group, we have access to SharePoint and we also have access to Teams. Now, Teams uses SharePoint as its document storage, so when you create the Team you also have to create the SharePoint. And it’s done automatically for you.
So let’s have a look at how that surfaces in Teams. So you can see here, for every channel that I look at in Teams, I’ve got a little files tab on the right here. So now I’m looking at the files in that design channel. In every files tab I’ve got this open in SharePoint link where I can click on and it will open up a browser and show me those files, but in SharePoint. So let’s just put them side by side again and you can see … and you can see here that we’ve got – I’ll just do that and put A to Z – you can see these are exactly the same files. So I’m in Teams but I’m actually looking at files that are stored in SharePoint.
And that goes for every channel within SharePoint. You can see, if I go into the SharePoint site and I choose documents here, that’s actually showing me all the channel folders for each of the channels within that Team. So let me switch to Teams again, and I’ll go back to the Teams there. And you can see there’s General Design Digital Assets and Design Digital Assets and so on. So Teams relies on SharePoint to get its documents.
So the link is fundamental. It’s intrinsic, as in you couldn’t just delete the SharePoint site and keep the Team. The two work together as one.
OK, so that was a whirlwind tour of those subjects. Obviously, we’ve only brushed the surface and I’m sure you guys have a lot of questions. So Alex, do we have any questions and do you want to read some out now?
Alex: Yeah, we’ve got about six questions.
Matt: OK, perfect.
Alex: The first question from Karina. How long do files in OneDrive stay in the recycle bin before they disappear completely?
Matt: So you have 93 days.
Alex: OK. Next question. It’s a three-part question. First part is, how we can secure no access from third parties outside the company or other Teams to SharePoint and OneDrive.
Matt: Right. So that can be done at the admin level. So let me just skip over to the SharePoint admin centre. So you’ve got complete control over that. You can stop people from sharing outside altogether if you want. So if I go to settings and sharing, advance, they moved this around quite a bit. Here we go, sharing.
So you’ll see here we’ve got this sharing, it’s like a slider of settings here. So you can see we’ve got SharePoint and OneDrive. Now, remember the three, or sorry, the four options we looked at when we shared? Anyone was the most … or the least restrictive. So that was the most open. All the way down to very specific. So what we could do here is take away permission to allow anyone to share. So when I set – if I bring these sliders down to here, we’ll stop people from sharing anonymously completely. That’s across the board. So this is at a sort of tenant level. And then, at any point, for any site, you can then go and choose a specific site and then also set their sharing permissions as well.
So you see here we’ve got the four options here too. So you’ve set like a tenant level sharing permission, and then you can set an individual site sharing permission. So, as administrators, you’ve got complete control over what everybody can do.
Alex: OK, so the same delegate asks, two, how I upload docs, or don’t we need to upload any further new docs? And three, where the data files will be stored at the end, just on a private computer?
Matt: So uploading. Yeah, we didn’t cover that today but uploading documents to OneDrive and SharePoint is still a thing, definitely. So it works in exactly the same way in both areas. So wherever you are, in whatever library you’re looking at, you have an upload button and you can upload files and folders. So when you do that it allows you to go browse your computer and then you can select your folder and then hit upload, and it’ll start copying the files up to the computer. Let me check what I’ve got in here. Nothing. So I should be able to just hit upload and then it will upload that new – you see it’s uploading to documents – and then eventually that will show up here when it’s finished. There you go, there’s my new folder.
So uploading is definitely a thing. Now, correct me, keep me honest if I’m not answering this correctly, but what I think you mean by where are the documents stored eventually, if you’re talking about SharePoint and OneDrive, they’re actually stored in a huge database hosted by Microsoft in the Microsoft 365 infrastructure. So it depends on your company’s location as to which datacentre you’re actually using.
So, for example, if you’re a UK based user, sorry, customer, these days you’re in a UK datacentre. And that’s two datacentres split between London and Durham. And they will be failing over a lot of the time. It’s not just like a primary, secondary. It’s always in flux. If you are an EU customer, then it’s Amsterdam and Dublin. And then, wherever you are in the world, it’s a different mix of datacentres.
So basically, uploading a file or creating a new file gets put into a database and that database is hosted in one of those various datacentres.
Now, if it’s the actual computer you’re talking about, so if you’re talking about syncing, the file itself is just stored normally like a normal file. So it’s actually a good point, or a good thing to mention here is that if you sync your files to a computer and the drive is not encrypted, you’re not using something like Bitlocker or FileVault, then those files are obviously exposed. So if you have sensitive information that you’re syncing, you must make sure that you encrypt the drive, so if it was stolen or lost the computer couldn’t have the files extracted from it.
Alex: OK, a few more questions have come in in the last few minutes. The next one is, we’re a Mac user office. Are there restrictions in usage? For example, I do not have the block download feature.
Matt: I’m not sure about that specific one. But there are, yeah, there are occasionally minor differences between what Macs and what Windows computers can do. I think the block download should be available, though, to a Mac user. I wasn’t aware that that was a thing. Let me just see if I can … potentially it’s something … using it in OneDrive. Let me just check that. If I just share … yeah, so you should see that block download feature. And I’m not sure why. I didn’t think that was a – because it’s a browser feature rather than linked to the operating system. Unless it’s Safari that you’re using and perhaps it’s not available in Safari.
What we do see a lot of with Mac users is Safari tends to cause quite a few problems. Like joining live events like these, for example, with Safari can bring a lot of problems. So if you’re a Mac user and you’re not seeing the features that you’d expect, try switching to Google Chrome or something else.
Alex: Next question. In SharePoint, do I need to be the owner to add more members to the group?
Matt: You don’t need to be the owner, because you can … you can add members but the owner must approve the joining of the new member. So anyone can come to this page and go add members and add member, and then you type in the name. But the owner of the group or the owners of the group then get a notification saying so and so has asked if so and so can join the team, do you mind. And then they just approve it.
So anyone can add members but only owners can approve.
Alex: The next question is, can the period of deletion in the recycle bin be prolonged?
Matt: No, unfortunately in the cloud you don’t – I don’t think you get any control over the recycle bin. I think that’s a Microsoft setting that can’t be changed.
Alex: Next question. When I upload and sync, not all my files sync.
Matt: Well, they should do. Everything should sync. The only control you have over it is to – you can change the sync settings to choose the folders. So here I’ve gone to the OneDrive sync client, and you can actually pick and choose the folders you want to sync. But by default, everything syncs. So, unless you’ve manually come here and changed this, everything should be syncing.
Alex: Another delegate asks, I had issues with uploads being stuck half way to full upload. It seemed too slow … it seemed to slow down my PC and it affected my speed of working. Any tips?
Matt: What, uploading documents? I’m not sure that I’ve got any tips. I mean, I’d use a modern browser, if that’s possible, so the most up-to-date version of Google Chrome or Microsoft Edge is preferred. And as I said, there are some issues with Safari but uploading isn’t one of them. So uploading should work just as well in Safari. But I’d just make sure that you have the most up to date version of the browser.
Obviously, network bandwidth comes into play in this situation. It’s very important that you have good bandwidth, which is obvious. So perhaps you could look at that and perhaps do a speed test – use Speedtest.net to see if you have a good connection to the Microsoft 365 datacentre. Because obviously, when you upload a file, you’re uploading it to Microsoft 365 datacentre, so the worse your connection to the internet, the slower the upload is going to be.
And the other thing – this is probably a bit drastic – but I would definitely recommend going to Windows 10, if you haven’t already. That really helps with everything. Just in terms of disc access and browser performance. There’re so many performance gains to be had from going to Windows 10. So I’d recommend that as well.
Alex: OK. How do I save one piece of document from OneDrive to my desktop?
Matt: How do you … OK. So let me just go to OneDrive and I’ll show you. So if you want to save a document to your desktop, you can just – I’ll go to apps here – for example, this image, you just hit that, select it, so you’ve got the little tick next to it, and then hit download. And then it’ll download it, basically, to your default downloads folder. So if I open this file now – actually, I don’t know what’s in that image. I better not open it. But if I go to downloads now, you can see, there it is. So it’s in the downloads folder for Windows. And it’s the same with Mac as well.
Next question. I think we’ve got time for one more.
Alex: The next question. I get a message about names containing characters that aren’t allowed. Are there illegal characters that should be used … that shouldn’t be used?
Matt: Yes, there are. So that is documented, and they’re the obvious ones like question marks, dots, forward slashes and that kind of thing. I will send the link to Totality, so that can be shared with you guys alongside the video and the other materials, that explains which characters can’t be used. Now, I think it’s different in Windows and Mac. Windows is really strict about what file names you can use. So for example, if I go into my – one thing that it really doesn’t like is space at the beginning of a name. So if I try and put a space before the title of this file that’s being synced, and then try and save it, it will actually remove the space.
So Windows is very sort of strict and will manage the, or almost mitigate the problems on your behalf. Mac isn’t so clever. So on a Mac I could add that space and then I’d get an error on the OneDrive client saying we couldn’t sync this file, you need to change the file name.
So Windows is much smarter at managing that on your behalf than Mac is, but yeah, there’s a whole bunch of particular characters you can’t use in file names because they break the sync.
All right. So it’s 12 o’clock, so we’ll draw it to an end there. And I just wanted to say thank you so much for your time. We really appreciate you joining and I hope you got a lot out of the talk. And we’ll hopefully see you next time.